The KitchenAid K400 Blender is built for thick blends. It handles ice, fibrous greens, and nut butters with steady torque. That power is useful, but it creates heat and wear.
Most K400 problems come from three things:
- Residue that increases blade drag
- Moisture trapped in seals and lid parts
- Airflow restriction around the motor base
Owners commonly search:
KitchenAid K400 not turning on
KitchenAid K400 overheating
KitchenAid K400 smells like burning
KitchenAid K400 blade not spinning
KitchenAid K400 is leaking from the bottom
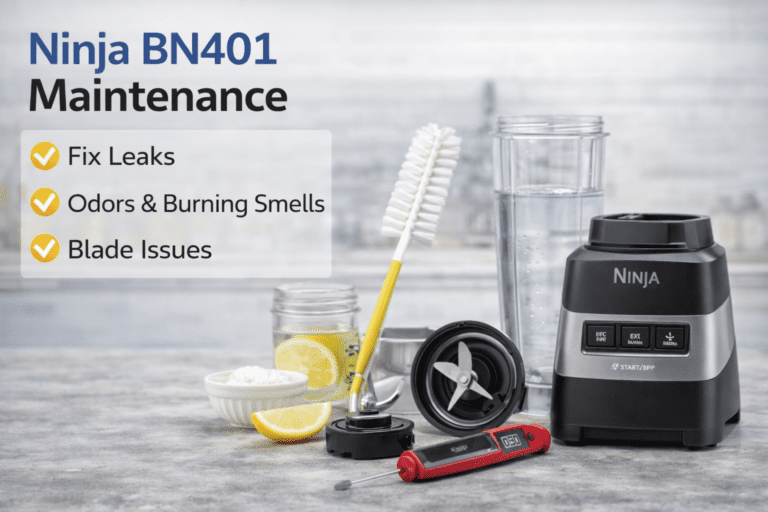
This guide is an ownership manual. It covers cleaning, odor control, mechanical protection, failure prevention, and long-term lifespan care.
If you want a full breakdown of real blending performance, motor behavior under load, and durability notes, start with this KitchenAid K400 performance and durability review before you build your maintenance routine.
Now let’s protect your K400 the right way.
Table of Contents
Why KitchenAid K400 Maintenance Prevents Overheating and Early Wear
The K400 is designed to maintain blade speed under resistance. That is helpful for consistent results. It also means the motor will work hard to hold RPM. Heat becomes the main wear driver.
Heat damages blenders in predictable ways:
- It dries out bearing grease over time
- It hardens and flattens gasket materials
- It weakens the motor winding insulation
- It increases drive socket wear from torque spikes
If you reduce drag and improve airflow, you reduce heat. When you reduce heat, you extend lifespan.
What typically wears first on the K400
Most owners notice one of these first:
- The lid gasket loses “spring” and starts holding odor
- The jar base seal starts weeping after hot blends
- The blade well gets sticky and increases drag
- Vents collect dust and raise motor temperature
- The drive socket starts clicking under heavy loads
Maintenance keeps these parts stable longer.
How the KitchenAid K400 System Works
Understanding the parts helps you clean smarter.
The blade system is fixed and sealed
The K400 blade assembly is not meant to be removed. That design reduces user error. It also means buildup in the blade well can stay hidden. Hidden buildup causes drag.
Drag increases load.
Load increases heat.
The jar material can haze if you clean it incorrectly
Cloudiness often comes from micro-scratches and detergent etching. Dishwashers accelerate both. Hard water adds mineral film.
The jar is durable, but it is not immune.
The motor base relies on airflow
The base pulls cooling air through vents. Dust and splatter block those pathways. When airflow drops, internal temperature rises quickly during thick blends.
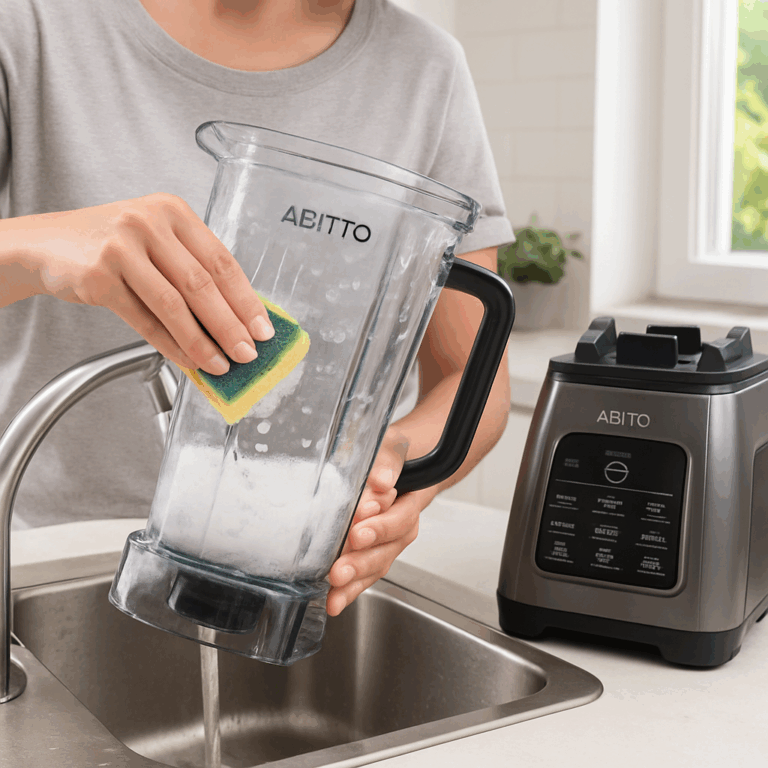
Daily Cleaning Routine That Prevents Blade Drag
Daily cleaning is your best maintenance tool. It prevents residue from hardening around the blade well.
Step 1: Rinse within two minutes
Rinse right after you pour the blend. Warm water is best.
Avoid sudden hot water after frozen blends. Thermal shock stresses the jar over time.
Step 2: Run a soap blend cycle
Fill the jar halfway with warm water.
Add one small drop of dish soap.
Blend on medium for 20 to 30 seconds.
This removes:
- Protein film
- Nut oil residue
- Fiber strings
- Dairy deposits
Step 3: Rinse and air dry fully
Empty the jar.
Rinse with clean water.
Invert on a drying rack.
Leave the lid off.
Never store the jar sealed while damp. Sealed moisture is the fastest way to create odor.
Weekly Deep Cleaning for Odor, Film, and Jar Clarity
Even with daily cleaning, a film builds up. It usually comes from smoothies, nut butters, and dairy.
Deep clean method for the jar
Fill halfway with warm water.
Add 1 cup of white vinegar.
Let sit for 10 to 15 minutes.
Blend for 20 seconds.
Scrub with a soft sponge.
Rinse thoroughly.
Air dry completely.
This breaks down mineral film and softens oil residue. It also helps keep the jar clearer over time.
Deep-clean the lid and gasket to prevent mold
Lids trap moisture in seams. Gaskets hold odor in the silicone pores.
Every 3 to 5 days:
- Remove the gasket if it is detachable
- Wash with mild soap and warm water
- Rinse fully
- Air dry completely before reinstalling
If the gasket stays damp, it softens. Soft gaskets compress faster. Compressed gaskets leak more easily and smell worse.
For a broader ownership framework, use this step-by-step blender cleaning system that prevents mold and seal wear and apply the same logic to every blender you own.
How to Remove KitchenAid K400 Odors Without Damaging the Jar
Odor is usually oil, not “old food.” Oil gets into the microscopic texture of plastic and silicone.
Garlic, onion, and savory odor removal
Fill with warm water halfway.
Add 1 tablespoon of baking soda.
Blend 20 seconds.
Let it soak for 20 to 30 minutes.
Rinse thoroughly.
Air dry with the lid off.
If the smell persists, do a short lemon blend:
Add warm water and a lemon wedge.
Blend 10 seconds.
Rinse fully.
Do not leave the lemon soaking for hours. Long acid contact can dull the plastic finish.
Protein shake odor removal
Protein residue forms a thin film. It clings to the blade well and lid seams.
Use the vinegar method weekly.
Then do one soap blend cycle.
Rinse twice to remove all soap.
How to Remove Stains from Turmeric, Berries, and Beets
Stains are pigment bonds. They stick harder when residue is present.
Baking soda paste for stains
Make a paste with baking soda and water.
Apply with a soft cloth.
Rub gently in circles.
Focus on the interior walls.
Rinse thoroughly.
Avoid abrasive scrubbers. They create micro-scratches. Micro-scratches trap future stains faster.
Prevent stains before they set
Rinse immediately after blending.
Run the soap cycle.
Do not leave colored blends sitting in the jar for hours.
Why the KitchenAid K400 Blade Is Not Spinning and How to Fix It
The K400 blade is fixed. You cannot remove it to scrub underneath. That means you must prevent buildup in the blade well.
Causes of blade drag
Blade drag usually comes from:
- Dried smoothie residue in the blade well
- Nut butter film that sticks to seals
- Fiber strands wrapped around the blade hub area
- Mineral scale near the base from hard water
Fix: Soak and loosen the drag safely
Fill the jar with warm, soapy water.
Let it soakfor 15 to 20 minutes.
Run a short blend cycle.
Pour out and rinse.
Test blade movement by spinning gently with a silicone spatula from above.
Never use metal utensils. Metal contact can nick or unbalance the blade system. Unbalance increases vibration. Vibration accelerates bearing wear.
Why Your KitchenAid K400 Is Overheating
Overheating is a load and airflow problem. The motor heats up when the resistance stays high and the cooling air stays low.
Most common overheating causes
- You are blending too thickly without enough liquid
- You are overfilling the jar
- You are running long cycles without a rest
- The underside vents are clogged with dust
- The jar has residue that increases drag
How to prevent overheating during thick blends
Use the vortex test:
If ingredients do not circulate, stop.
Add liquid.
Use the tamper if your jar supports it.
Blend in shorter bursts.
Rest the motor 30 to 60 seconds between cycles.
Thick nut butter is the top overheating trigger. It locks ingredients in place. The motor keeps trying to push through. Heat rises fast.
Why the KitchenAid K400 Smells Like Burning
A burning smell almost always means heat and friction. It is a warning sign.
Common causes
- Thick blend that stalled circulation
- The ice jam is holding the blade
- Vent blockage causing heat buildup
- Running too long on a dense recipe
- Jar base drag from residue
What to do immediately
Stop blending.
Unplug the base.
Remove the jar.
Let the motor cool for 20 to 30 minutes.
Inspect the underside vents.
Check the blade for drag.
If you keep blending through that smell, you shorten motor life. You also risk drive socket damage.
How to Clean the Motor Base Without Damaging Controls
The base houses electronics and motor components. It should never be wet cleaned like a jar.
Safe motor base cleaning steps
Unplug the blender.
Wipe with a slightly damp microfiber cloth.
Use a dry soft toothbrush around the dial and seams.
Wipe splatter near the controls.
Dry immediately with a clean cloth.
Never spray cleaner on the base. Spray migrates into seams. Moisture in the housing can corrode internal components.
Vent protection matters more than it looks
Once per month, check vents.
Dust and pet hair form a felt-like layer.
That layer blocks airflow.
Blocked airflow causes overheating.
Use a soft brush and dry cloth. Do not push debris into the vents.
Why the KitchenAid K400 Is Leaking From the Bottom
A leak from the bottom usually points to one of two issues:
- Lid and pouring spills that appear like a leak
- Jar base seal failure or gasket compression
First check: Is it really the jar base?
Wipe the jar dry.
Fill with water.
Let it sit on a paper towel for five minutes.
If water appears under the jar, it is the base seal area.
Why jar base seals fail
Base seals fail faster when:
- You blend hot soups often
- You run long, thick blends
- You store the jar wet
- You leave residue around the blade well
Heat expands materials. Cooling contracts them. That cycling compresses seals over time. Once seals lose elasticity, tiny weeps start.
If the leak is consistent, the jar base seal likely needs replacement. Do not ignore it. Leaks can drip into the drive socket area. That can cause corrosion and slipping.
Storage Habits That Prevent Odor and Seal Compression
Storage is part of maintenance.
Best storage practices
Store the jar upside down for airflow.
Store the lid off, or store the lid loosely placed.
Keep gasket parts fully dry before storing.
Do not store the jar sealed while damp.
Loop the cord loosely. Do not tightly coil it.
Keep the base away from stovetop steam and direct sunlight.
Moisture plus heat is the worst combination for seals and odor.
Unsafe User Behaviors That Shorten K400 Lifespan
These mistakes show up in complaint patterns across many blenders.
Blending thick mixtures without enough liquid
Dry blends force the motor to work at high load. Heat rises fast. Bearing grease breaks down quicker.
Using harsh scrubbers or metal tools
Scratches cloud the jar. Scratches also trap residue. That residue increases blade drag next time.
Ignoring vent cleaning
Vents are the cooling system. When they clog, the blender runs hotter. Hotter motors age faster.
Storing wet parts
Wet storage creates odor and mold. It also softens silicone. Soft silicone compresses and leaks sooner.
Overusing the dishwasher
Dishwasher heat and detergent dull the jar finish. It accelerates haze. Hand washing keeps clarity longer.
Monthly K400 Maintenance Routine for Long-Term Reliability
Once per month, do a full system check. This prevents small issues from becoming failures.
Monthly checklist
- Vinegar soak deep clean
- Baking soda odor flush
- Lid and gasket removal and wash
- Blade drag test after soak
- Vent dust removal on base
- Drive socket inspection for wear
- Cord and plug inspection
Drive socket wear signals
If you hear clicking under load, inspect the coupling area. Clicking can signal slipping or torque stress. It often gets worse on thick blends.
If you are considering alternatives with different coupling designs and motor cooling, browse this expert-tested blender lineup across every price tier to compare build architecture and longevity traits.
Troubleshooting Questions KitchenAid K400 Owners Search
Why is my KitchenAid K400 overheating during smoothies or nut butter?
Overheating happens when torque demand stays high, and airflow cannot cool the motor fast enough. Thick blends without enough liquid increase resistance and trap heat. Reduce batch size, add liquid to maintain a vortex, and clean underside vents before restarting.
Why does my KitchenAid K400 smell like burning plastic?
A burning smell usually means excessive motor load or stalled blade rotation. Dense mixtures or blocked vents force the motor to work harder, which increases internal temperature rapidly. Stop immediately, unplug, allow 20 to 30 minutes of cooling, then inspect blade drag and airflow.
Why is my KitchenAid K400 leaking from the bottom?
Bottom leaks typically indicate gasket compression or debris interfering with the base seal. Repeated hot blends expand and contract the seal, reducing elasticity over time. Remove the jar, clean thoroughly, dry completely, and test with a water fill to confirm if seal replacement is needed.
Why is my KitchenAid K400 blade not spinning, but the motor sounds on?
This usually means the blade is jammed or experiencing heavy drag from hardened residue. Ice blocks, thick nut butter, or buildup in the blade well can prevent free rotation. Unplug, soak with warm soapy water, and confirm smooth manual movement before blending again.
Why is my KitchenAid K400 not turning on?
First, confirm power at the outlet and proper jar seating. If the unit previously overheated, thermal protection may have triggered a temporary shutdown. Allow full cooling for 30 minutes before attempting a restart with a thinner blend.
Long-Term Ownership Optimization
The KitchenAid K400 performs best when you control three things: residue, moisture, and heat.
Clean right after blending.
Dry parts fully before storage.
Keep vents clear for airflow.
Avoid long, thick blends without rest.
Monitor blade drag and leaks early.
This is how you keep the K400 running as it did on day one.